

Integrated Recovery for a Non-RAID System (Windows)
-----------------------------------
Affected Roles: Administrator
Last Edit: September 30, 2025
-----------------------------------
System Recovery
When encountering major operational issues, the use of recovery files may be recommended to resolve an issue.
Example situations include:
- Windows OS not booting
- Important OS functions not working
- Software Viruses
This article will outline how to recover a Windows embedded Blackjack Cube using the Integrated Recovery for Image Recovery.
**NOTE: If you are unsure if you should run the Integrated Firmware Recovery, please consult with Digital Watchdog Technical Support.
Supported/Affected Devices
- DW Blackjack Cube (Windows)
- DW Blackjack P-Rack (Windows / Non-RAID)
- DW Blackjack E-RACK (Windows / Non-RAID)
Before you Begin
The recovery process will completely reset the NVR and return the system to its factory default. If you are using static IP settings in a managed network, it is recommended to document your computer’s network settings. You can use this information when reintegrating the computer into the network.
Recommended IP Settings include:
- IP Address
- Subnet or Subnet Prefix Length
- Gateway Address
- Preferred DNS Address
- Alternate DNS Address
Running the Recovery
- Reboot or power on the unit.
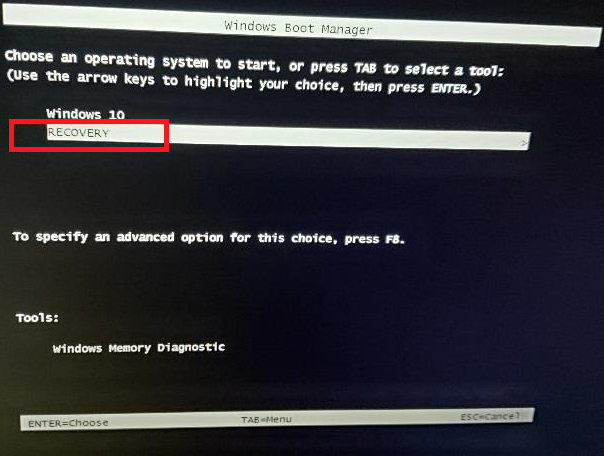
The Windows Boot Manager will momentarily display, prompting the selection of Windows 10, Recovery, or Windows Memory Diagnostic.
Use the arrow keys on the keyboard to select Recovery, then press the Enter key.
**NOTE: If your system does not generate the options as described above, you can press the F11 key during the boot to prompt the Windows Boot Manager. Make sure that you are not actually using an older server model that may require the use of a USB Recovery Key instead.
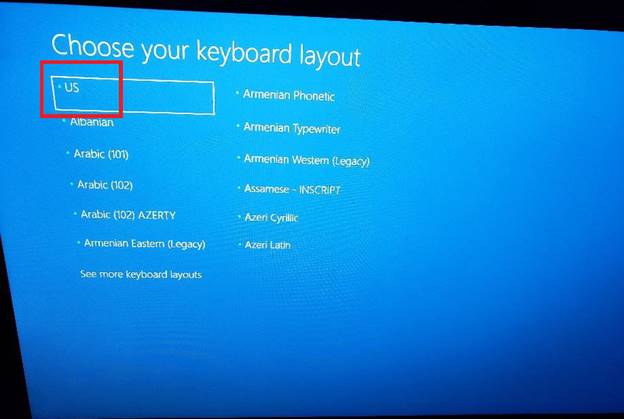
- On the Choose your keyboard layout screen, select the US layout.
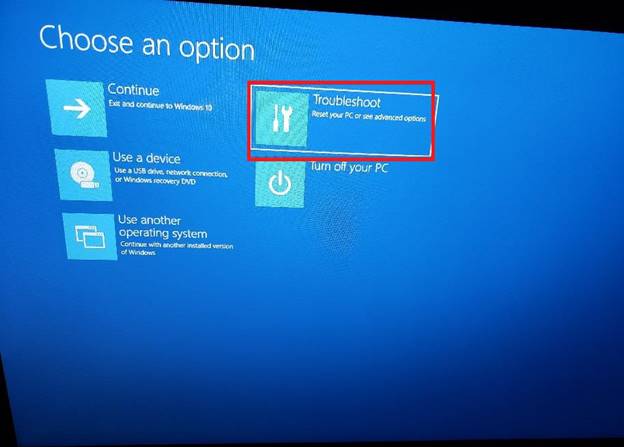
- On the Choose an option screen, select Troubleshoot.
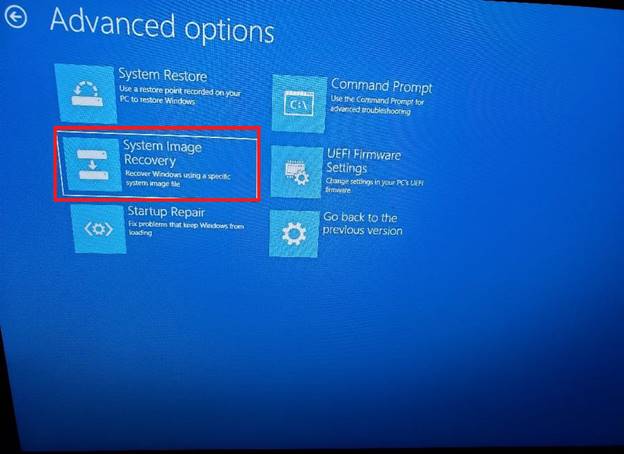
- On the Advanced options screen, select System Image Recovery.
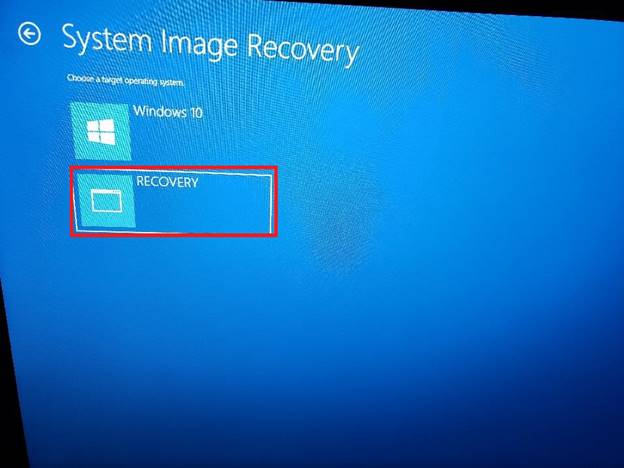
- On the System Image Recovery screen, select Recovery.
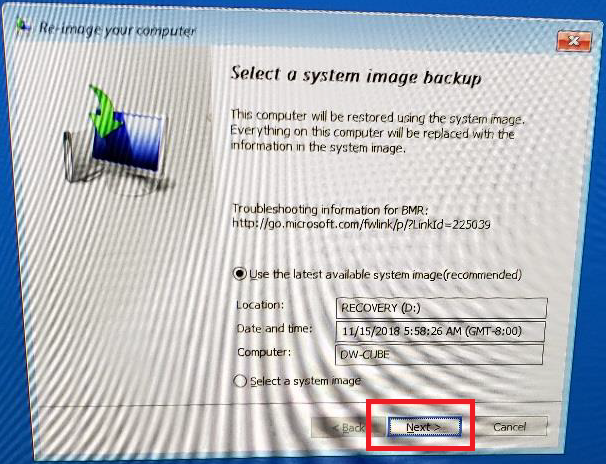
- The Select a system image backup screen will display when the System Image (recovery) was created.
Leave the settings as they are and click the Next button.
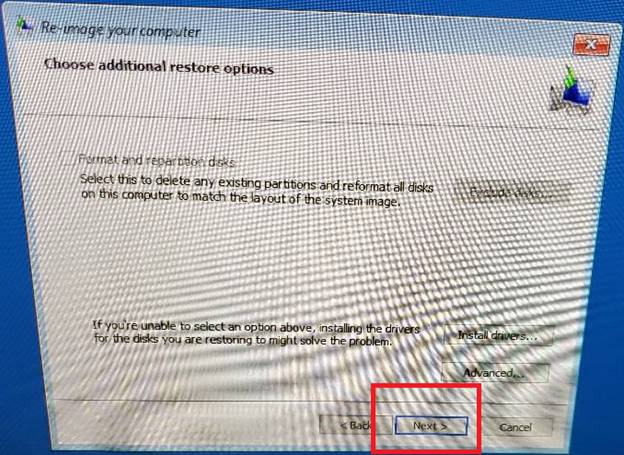
- On the Choose additional restore options screen, leave the settings as they are and click the Next button.
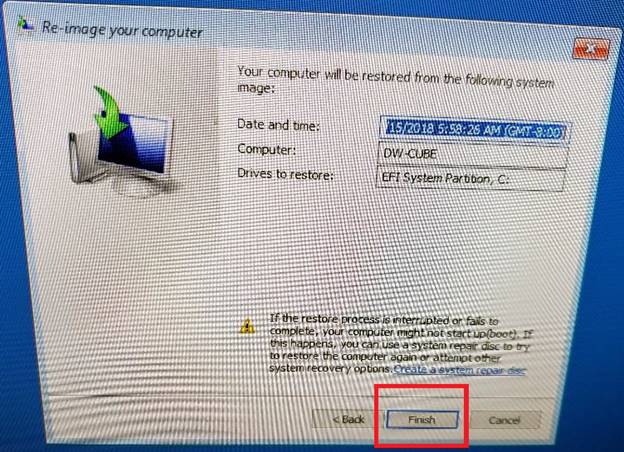
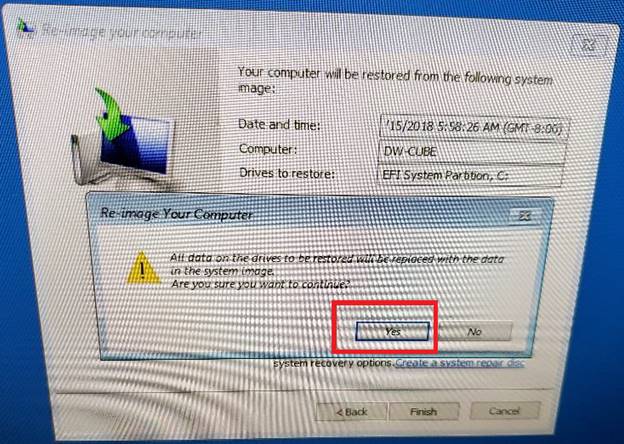
- A summary of the system restore point will display.
The summery includes when the restore point was created, what the Computer name will be defaulted to, and the target of the Image Recovery.
Leave the settings as they are and click the Finish button.
- A confirmation pop-up will display and asking to run the Image Recovery. It discloses that all data on the target drive will be replaced during the restoration process.
Select Yes to continue.
- The NVR will begin the recovery process. This process may take between 4 – 5 minutes to complete.
When the recovery process is complete, the unit will need to reboot.
The Windows OS should load normally following the Integrated Recovery.
If running the Recovery did not resolve your issue, please contact Digital Watchdog Technical Support for further assistance.
______________________________________________________________________________
For More Information or Technical Support
DW Technical Support: https://www.digital-watchdog.com/contact-tech-support/
DW Sales: [email protected] | www.digital-watchdog.com
Rev: 06/25 Copyright © DW. All rights reserved. Specifications and pricing subject to change without notice. ![]()

